Author: FLAdmin

  • Guardrails to Stop New Debt

    Guardrails to Stop New Debt

    When money is tight, willpower isn’t a plan—guardrails are. Guardrails are simple, pre-decided limits that make overspending harder and good choices easier. In this guide you’ll set clear spending freeze rules, flip on app-level card usage limits, and add small frictions that help you stop new debt—without living in spreadsheet jail.

    The Four Guardrails (at a glance)

    • Freeze: A short, focused spending freeze that pauses non-essentials.
    • Fences: Card controls: limits, blocks, and alerts that keep you on track.
    • Friction: Tiny habits that slow down impulse buys.
    • Failsafe: A security freeze or “no new credit” rule to block new borrowing.

    1) Spending Freeze Rules (30 days, with smart exceptions)

    A spending freeze is a temporary pause on wants, not a forever ban. Pick a start/stop date and define two lists:

    • Needs (allowed): Rent/mortgage, utilities, transit, basic groceries, insurance, minimum debt payments, medical.
    • Wants (paused): Takeout, clothing, gadgets, décor, impulse online buys, paid apps you can live without.

    Design exceptions on purpose: Allow one or two small treats (e.g., $10/week coffee or one family activity) so you don’t rebound later. Post your rules on the fridge or your phone notes and share them with your household.

    Make it doable: Meal-plan before Day 1, inventory pantry/freezer, and schedule a weekly “use-it-up” dinner. Pre-decide three free/cheap swaps for your usual splurges (home latte, library e-book, walk date).

    2) Card Usage Limits (set once, they work all month)

    Most banking and card apps let you set limits and blocks that act like rails on a highway:

    • Daily/transaction caps: e.g., “Max $30 per purchase on debit.”
    • Merchant/category blocks: Disable restaurants, online marketplaces, or cash advances for the freeze period.
    • Instant on/off: Keep the credit card “off” by default; toggle “on” only for planned essentials.
    • Real-time alerts: Turn on push notifications for every swipe so you see spending in the moment.
    • Virtual card numbers: Use single-merchant or single-use numbers for subscriptions and set a hard monthly cap.

    Pro tip: Remove saved cards from browsers and retail apps. Keep one physical debit card for essentials; store the rest out of reach.

    3) Friction Habits (small delays that save big)

    • 24-hour rule: Every non-essential sits for at least one day; if over $100, wait two pay cycles.
    • Cart → calendar: Move online “Add to cart” items to a calendar reminder titled “Re-decide.”
    • Cash or prepaid envelope for fun money: When it’s empty, you’re done for the week.
    • Unsubscribe sweep: Nuke promo emails/texts and unfollow 3–5 “spendy” accounts.

    4) Failsafe: No New Credit

    Choose one:

    • Personal rule: “No applications for 90 days.” Write it down and tell a friend for accountability.
    • Security freeze: Place a credit freeze with the three bureaus so new accounts can’t be opened without your OK. It’s free and reversible.

    14-Day Guardrail Plan

    1. Day 1: Write your freeze rules and exceptions. Share with your household.
    2. Day 2: Turn on card controls (caps, merchant blocks, alerts). Remove saved cards from apps and browsers.
    3. Day 3: Inventory pantry; build a 7-day meal plan. Prep two batch-cook staples.
    4. Day 4: Set up one virtual card for recurring subscriptions with a strict monthly limit; cancel or pause what you don’t use.
    5. Day 5–7: Apply the 24-hour rule; move any “not spent” cash to your smallest debt or emergency fund.
    6. Day 8–10: Do an unsubscribe sweep and unfollow “temptation” feeds. Add calendar “Re-decide” slots.
    7. Day 11–14: Review what worked; tighten one rule (e.g., lower daily cap) and keep one treat that helped you stick with it.

    Optional: BNPL & Subscription Boundaries

    • BNPL: Allow at most one active plan at a time—or pause BNPL during the freeze. Treat it like debt (because it is).
    • Subscriptions: Cap the virtual card limit; if a service tries to bill above cap, it declines automatically.

    Common Pitfalls (and simple fixes)

    • “I’ll just try harder.” Don’t rely on willpower—use toggles and caps.
    • “It’s just one purchase.” That’s fine—if it’s an exception you designed. Otherwise, park it in your calendar.
    • “I need the credit card for points.” Points don’t beat interest. Use debit during the freeze; revisit later.

    Bottom line: Guardrails beat guilt. Set a short spending freeze with clear exceptions, use app-based card usage limits, add small daily frictions, and block new credit. That’s how you stop new debt—and keep more of every paycheck working for you.

  • Read & Dispute Credit Report Errors

    Read & Dispute Credit Report Errors

    Credit report mistakes happen—and they can cost you money in higher rates, denied applications, or bigger deposits. The good news: you have clear rights to challenge inaccurate, incomplete, or unverifiable items. Use this guide to skim your reports fast, follow clean dispute steps, and send a tidy credit report dispute letter template that gets action.

    30-Second Overview

    • Pull your reports from all three bureaus (Equifax, Experian, TransUnion). Data often differs.
    • Dispute errors with both the credit bureau and the company that furnished the data (the lender/collector).
    • Be specific, include proof, and keep copies. Most investigations wrap up in roughly a month.

    Credit Report Checklist (10 Minutes)

    1. Identity details: Legal name variations, addresses, date of birth, last four of SSN, employers.
    2. Accounts (tradelines): Duplicates, wrong balances/limits, incorrect late payments, accounts you don’t recognize, wrong status (open/closed), odd dates.
    3. Collections & public records: Ownership, dates, paid/settled status, medical bill mix-ups.
    4. Inquiries: Hard pulls you don’t recognize (soft pulls don’t affect scores).
    5. Proof package: Statements, payment confirmations, settlement letters, ID-theft or police/FTC reports.

    Dispute Steps (What to Do First)

    1. File with the credit bureau (online or by mail). Identify each item precisely, explain why it’s wrong, and state the outcome you want (delete, correct dates/limits, mark “paid,” etc.). Upload copies of supporting documents—never send originals.
    2. Send a direct dispute to the furnisher (the lender/collector) with the same evidence. This gives the data source a chance to correct their reporting.
    3. Track everything: If mailing, use certified mail with return receipt. Keep copies and a simple log of what you sent and when.
    4. Calendar reminders: Add follow-ups about a month out to check status and request results if you haven’t heard back.

    Credit Report Dispute Letter Template

    Copy, paste, and replace brackets. (If filing online, paste this text and upload attachments.)

    Your Name
    Your Address
    City, State ZIP
    Phone | Email
    Date
    
    [Equifax/Experian/TransUnion]  OR  [Furnisher/Lender/Collector Name]
    Address
    City, State ZIP
    
    Re: Dispute of credit report item(s)
    
    To whom it may concern:
    I am disputing the following information on my credit report from [bureau], report # [if shown].
    
    Item: [Creditor/Collector], Account # [last 4], Reported as: [late/collection/balance/limit/date/etc.]
    Reason: [Explain why it’s inaccurate/incomplete/unverifiable. Include dates, amounts, and facts.]
    
    Requested action: [Delete / Correct to ___ / Update status to Paid/Closed as of ___].
    
    I have enclosed copies of [statements, proof of payment, settlement letter, identity theft report, etc.].
    
    Please investigate and notify me in writing of the results.
    Sincerely,
    [Your Name]
    Enclosures: [list documents]
    

    Timeline & What Happens Next

    • Investigation: The bureau reviews and typically forwards your documentation to the furnisher.
    • Results: You’ll receive a written outcome. If corrected or deleted, you can request an updated report and ask the bureau to notify recent report recipients.
    • If you disagree: Re-dispute with new evidence, add a short statement of dispute to your file, and consider filing a complaint with the appropriate regulator.

    Tips to Strengthen Your Case

    • Be specific: Dispute line-by-line, not “everything.” Specifics get action.
    • Prove it: Screenshots of statements, payment confirmations, or letters carry weight.
    • Mind dates: Note when you submitted, received responses, and what changed.
    • Identity theft? Pair your dispute with an identity-theft report and consider a fraud alert or security freeze.

    Common Pitfalls (Avoid These)

    • Sending originals: Always send copies; keep the originals safe.
    • Vague claims: “Please fix all errors” can be dismissed as frivolous. Provide details and documents.
    • Stopping payments on valid debts: Disputes address accuracy, not avoidance of legitimate obligations.

    Bottom line: A precise credit report checklist, clear documentation, and straightforward dispute steps are your best tools. Use the credit report dispute letter template, keep records, and follow up. Most fixable errors get resolved with a clean, well-documented request.

  • Credit Score 101: What Matters (and What Doesn’t)

    Credit Score 101: What Matters (and What Doesn’t)

    Your credit score is a three-digit snapshot of risk—how reliably you’ve paid in the past and how you’re using credit today. The good news: you don’t need to memorize formulas. Master a few credit score basics, focus on the biggest credit score factors, and use simple score tips to move the number in the right direction.

    30-Second Primer

    • Scores range roughly 300–850. Higher is better.
    • Scores are model-based (FICO®, VantageScore®). The ingredients are similar, but weights can vary by model and lender.
    • Scores change as lenders report updates—usually monthly, sometimes faster.

    What Really Moves Your Score

    Factor What It Means Typical Impact
    Payment history On-time vs. late/collections. A single 30-day late can sting. Largest factor
    Amounts owed / utilization Your credit card balances compared to limits (per card and overall). Very high
    Length of credit history Age of oldest account, average age, and time since last activity. Moderate
    New credit / inquiries Recent hard pulls and newly opened accounts. Small–moderate
    Credit mix Diverse types (credit cards, auto, student, mortgage, etc.). Small

    Score Tips: Fastest Levers First

    • Pay on time, every time. Autopay at least the minimum to avoid late marks. If you’ve missed, get current and stay current—recent positives help.
    • Lower utilization below 30%—ideally <10%. Pay card balances before the statement closes, spread balances across cards, or request a credit limit increase (without taking a hard pull if possible).
    • Keep old, good accounts open. They boost your average age and total available credit.
    • Be selective with new credit. Group rate-shopping for auto/student/mortgage within a short window so multiple pulls count as one event (model-dependent).
    • Dispute errors. Incorrect late payments or limits can drag scores down; fix them with the bureaus and the furnisher.

    What Doesn’t Matter (Directly)

    • Income and job title. Lenders consider income for approvals, but the score itself doesn’t use it.
    • Checking or savings balances. Bank cash isn’t part of your credit report.
    • Soft inquiries (your own score checks, pre-approvals, employer checks). These don’t affect the score.
    • Debit card usage. Only credit accounts and certain loans/collections are reported.
    • Paying interest vs. paying in full. The score favors low balances and on-time payments; it doesn’t “reward” interest paid.

    Myths & Traps to Avoid

    • “Carry a small balance to build credit.” Not necessary. Zero utilization at statement close can be fine; many aim to let a tiny balance report (1–9%) and then pay it off.
    • “Closing cards always helps.” Closing reduces available credit (raising utilization) and can shorten average age over time—both can hurt.
    • “One dispute fixes everything instantly.” Disputes take time; provide documents and follow up.
    • “All inquiries are equal.” Hard pulls matter; soft checks don’t. For big loans, rate-shop within a focused window.

    Build or Repair: A Simple 90-Day Plan

    1. Day 1: Turn on autopay for minimums; set a second recurring payment for extra principal on the highest-rate card.
    2. Day 7: Pay revolving balances down to <30% utilization (target <10% if you can). Ask issuers about limit increases with soft pulls.
    3. Day 10: Pull free reports; dispute clear errors (wrong late dates, limits, balances).
    4. Day 30–60: Add positive history if thin/credit-invisible: secured card, credit-builder loan, or have on-time rent/utility reporting services send data.
    5. Day 90: Recheck utilization and payment history; avoid opening new accounts unless they solve a real need.

    FAQ

    How often do scores update? Typically after lenders report (monthly). Paying down a large balance before the statement date can show up on the next cycle.

    How long do negatives last? Most late payments can remain up to seven years, but their impact fades with time and positive behavior.

    Bottom line: Nail on-time payments, keep revolving balances low, avoid unnecessary new accounts, and protect your oldest tradelines. These fundamentals drive the majority of your score—and they’re fully under your control.

  • Balance Transfer Cards: Pros, Cons, and Pitfalls

    Balance Transfer Cards: Pros, Cons, and Pitfalls

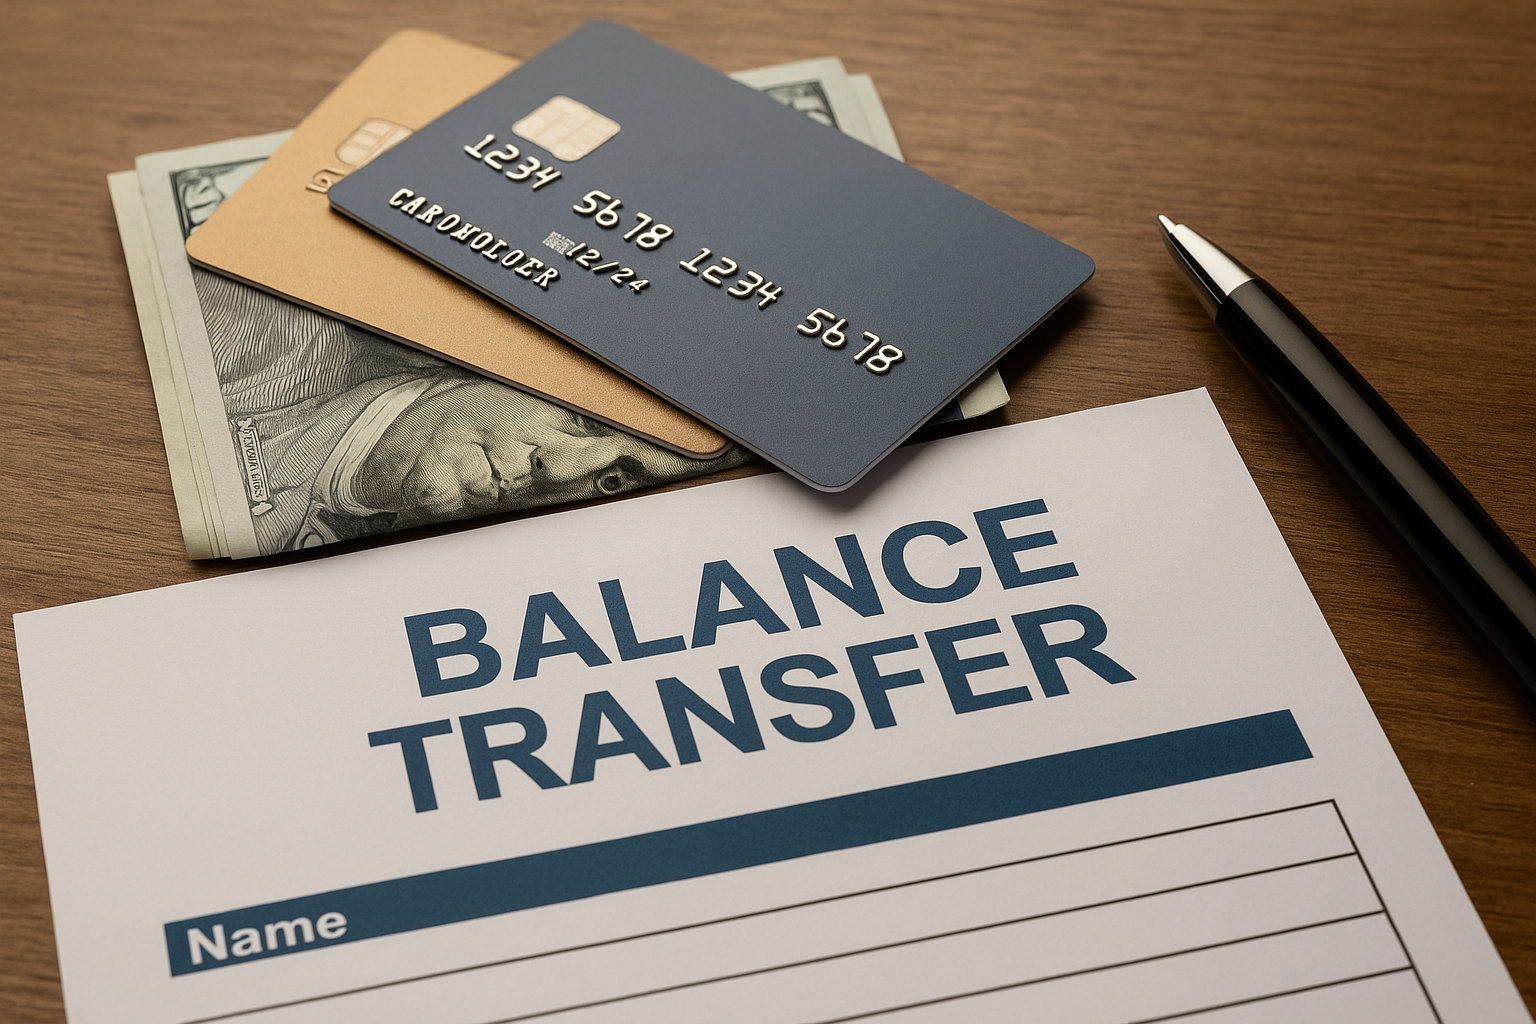
    Used well, a balance transfer card is a bridge from high interest to breathing room. You move an existing balance to a new card with a temporary 0% intro APR, so more of your payment attacks principal instead of interest. That can speed up payoff, simplify your routine, and give you a clear finish line—if you set one.

    How Balance Transfers Work (Quick Primer)

    • Open a card that offers 0% intro APR on balance transfers for a set period (often 12–21 months).
    • Request the transfer; the new issuer pays your old card and moves that balance to your new account.
    • Keep paying the old card’s minimum until it shows $0 (transfers can take days to a couple weeks).
    • During the promo window, the transferred amount accrues no interest; when it ends, the regular APR applies to any remaining balance.

    Pros

    • Save interest, finish faster. With 0% intro APR, every dollar reduces principal. That shortens the timeline if you pay on a schedule.
    • Simplify payments. Consolidating multiple balances into one can reduce missed due dates and mental overhead.
    • Cash-flow relief. Lower (or zero) interest for a period can smooth your monthly budget while you pay down.

    Cons & Fine Print

    • Transfer fees. Most cards charge 3%–5% of the amount transferred (≈$30–$50 per $1,000). Always include this in your math.
    • Limited transfer amounts. You may not be able to move the full balance; the transfer limit can be below your total credit limit.
    • Promo can end early if you’re late. A missed/late payment can void the 0% APR and trigger penalty pricing.
    • No grace period on new purchases. If you carry a transferred balance, new purchases on that card often accrue interest immediately. Don’t mix everyday spending with a transfer balance.
    • Credit score dynamics. A big transfer on a small limit can spike utilization and nudge your score; it typically improves as you pay down.

    0% APR Tips That Actually Work

    1. Pre-set the “finish-on-time” payment. Add the transfer fee to the amount moved, divide by promo months, and automate that payment right after payday. Example: $3,000 moved + $120 fee = $3,120 ÷ 15 months ≈ $208/month.
    2. Autopay the minimum, calendar the rest. Set autopay for at least the minimum to protect the promo; then schedule your extra payment as a separate recurring transfer.
    3. Don’t swipe the transfer card. Use a different card (paid in full monthly) for purchases to preserve a grace period on spending.
    4. Snowball windfalls. Tax refunds, side income, or “found money” should go 80–100% to the transfer while the APR is 0%.
    5. Watch the expiration date. Put two reminders on your calendar: 60 days before the promo ends and 14 days before.

    Is a Balance Transfer Right for You?

    • Yes, usually if your current APR is high, the transfer fee is reasonable, and you can clear the balance within the promo window.
    • Maybe not if you’ll keep spending on the transfer card, can’t automate payments, or the fee outweighs expected interest savings.
    • Consider alternatives (and compare total cost): a lower-rate consolidation loan with fixed payments, negotiating lower APRs, or an aggressive snowball/avalanche plan without opening new credit.

    Common Pitfalls to Avoid

    • Only paying the minimum. You’ll still carry a balance when the promo ends—and interest restarts. Automate the “finish-on-time” amount instead.
    • Missing a due date. One slip can end your 0% period. Use autopay and a backup calendar alert.
    • Ignoring the fee. A 5% fee on $8,000 is $400. Make sure projected interest savings beat that cost.
    • Mixing purchases and transfers. Everyday spending on the transfer card can accrue interest immediately and complicate payoff tracking.
    • Extending the term quietly. Don’t lower payments once the 0% window starts; keep the calculated amount so you’re debt-free before the promo ends.

    Quick DIY Calculator (Copy/Paste)

    Monthly target = (Transferred amount + Fee) ÷ Promo months. If that number doesn’t fit your budget, the transfer may not be the right tool—or you may need a longer promo or smaller amount.

    Bottom line: Balance transfer cards are excellent tools if you plan the payoff, protect on-time payments, and keep spending separate. Do the fee math, automate a finish-by-promo schedule, and your 0% window can turn balance transfer pros cons into a clear win—with smarter 0% APR tips and fewer transfer mistakes.

  • Focus Routines for Busy Brains

    Focus Routines for Busy Brains

    Your brain is juggling work, home, and 47 open loops. You don’t need a perfect system—you need a repeatable one. These focus routines are built for real life: short cycles, generous buffers, and simple habits that keep you moving. Use them to create productivity routines for busy people, practice deep work for parents, and upgrade your daily attention hygiene.

    The Focus Friction You Can Control

    • Ambiguous tasks: “Work on project” is mush. Clear tasks are small and end with a verb (“Send draft,” “Edit page 3”).
    • Context switching: Every switch burns attention. Group similar tasks and batch messages.
    • Infinite inboxes: Treat inboxes (email/DMs) like places you visit, not open tabs you live in.

    The 3-Part Daily Focus Routine (Under 15 Minutes Setup)

    1. Mind Sweep (3 min): Write every open loop. Don’t sort—just dump.
    2. Pick the Top 3 (3 min): Choose three outcomes that change the day if done. Make them concrete: “Outline 2 sections,” “Book dentist,” “Ship data pull.”
    3. Calm Blocks (2 × 50 minutes): Two protected blocks beat a 10-hour scramble. One in the morning, one after lunch. Everything else fits around them.

    Deep Work for Parents (Time-Boxed)

    When life runs hot, you need focus you can start in 60 seconds. Try this ladder:

    • Gold (50 min): Phone on Do Not Disturb, one tab, headphones. Timer on.
    • Silver (25 min): Same rules, half the time. Perfect for nap windows.
    • Bronze (10 min): Micro-sprint: outline bullets, clean data, draft intros. Small moves, big momentum.

    Boundary script: “I’m heads down for 25 minutes. After that I’m available for 10.” (Say it out loud to family/teammates—or to yourself.)

    Attention Hygiene (Make Distraction Boring)

    • Single-screen rule: Keep only one active screen during focus blocks.
    • Notification audit (weekly): Turn off badges; keep only calls and calendar alerts.
    • Two inbox windows: 11:30 a.m. and 4:30 p.m. Handle email/DMs then; the rest of the time, log off.
    • Desk reset (2 min): End each day with a 120-second tidy: tomorrow’s Top 3 sticky, water bottle filled, charger connected.

    Micro-Exercises That Train Focus (2–5 Minutes)

    • Breath box (60–120s): Inhale 4, hold 4, exhale 4, hold 4. Repeat 5 times before a block.
    • 1-page scan: Read a single page and summarize in one sentence. Builds precision quickly.
    • Number ladder: Count 1→10; if you notice drift, restart at 1. It’s a reset, not a fail.
    • Tab purge: Close 5 tabs. If a tab matters, convert it to a task with a verb.

    The 50/10 Rhythm (With Recovery)

    Run a 50-minute block followed by a 10-minute pit stop. Use the 10 for a short walk, water, or a brainless micro-chore. Avoid “quick scrolling”—it spikes dopamine and chops attention when you return.

    Template: One-Page Focus Planner

    Section What to Fill In
    Top 3 Outcomes 1) ____ 2) ____ 3) ____
    Block A (time) Goal: ____ / Start: __:__ / Win metric: ____
    Block B (time) Goal: ____ / Start: __:__ / Win metric: ____
    Inboxes (2 slots) 11:30 — triage • 4:30 — replies
    Micro-Exercises Breath ×5 • Tab purge ×5 • 1-page scan
    Evening Reset Tomorrow’s Top 3, desk reset, water ready

    Weekly Focus Review (15 Minutes on Friday)

    1. Wins: List 3 outcomes shipped (not hours worked).
    2. Friction: Name 1–2 moments you lost focus. What cue preceded it?
    3. Rule tweak: Add/adjust one rule (e.g., move Block A earlier, shift inbox windows).
    4. Plan next week’s anchors: Pre-schedule two focus blocks/day; protect family or commute realities.

    Minimal Tools, Max Effect

    • Timer: Any phone timer works—use DND + a single allowed contact for emergencies.
    • One page or one sticky: Your Top 3 lives where you can see it, not buried in an app.
    • Headphones: Set a “focus” playlist with neutral audio (or brown noise) to mark work mode.

    When Life Blows Up (Graceful Degrade)

    • Keep the ritual, shrink the block: If 50 minutes is impossible, run 10.
    • Protect the Top 1: On messy days, one needle-mover beats five partial starts.
    • Reset fast: After interruptions, breathe once, reread your last sentence, and restart the timer.

    Bottom line: Busy brains don’t need more willpower—they need fewer decisions. Pick your Top 3, run two calm blocks, guard your inbox windows, and end the day with a two-minute reset. That’s how productivity routines for busy people feel humane, how deep work for parents becomes realistic, and how daily attention hygiene actually sticks.

  • Simple Rate Negotiation Scripts (Job & Freelance)

    Simple Rate Negotiation Scripts (Job & Freelance)

    Negotiating your pay doesn’t have to feel combative. With a clear ask, calm tone, and a few reusable lines, you can advocate for your value—without burning bridges. Use the plug-and-play scripts below as starters for a salary negotiation script (new offer), an in-role raise script, and a freelance rate increase email. Edit brackets, add your numbers, and deliver with confidence.

    Quick Prep (3 Steps, 5 Minutes)

    • Target & floor: Pick a confident target (what you’ll ask) and a quiet walk-away number.
    • Evidence: Three bullets that tie your work to outcomes (revenue, savings, speed, quality).
    • Alternates: If base can’t move, which levers help? (sign-on, bonus, title, PTO, remote, scope).

    New Job Offer — Salary Negotiation Script

    You (phone/Zoom): “Thanks for the offer—I’m excited about the role and team. Based on the scope and market data for [role/level/geo], I’m targeting $[X] base with total comp around $[Y]. Can we explore that range?”

    If asked for justification: “In my last role I [impact: ‘reduced cycle time 28%’ / ‘grew pipeline by $1.2M’]. I’ll bring that playbook here, which is why $[X] feels aligned.”

    If they counter below target: “I appreciate that. If base is capped at $[A], could we bridge with a $[B] sign-on and title alignment to [Title], plus a six-month compensation review tied to [objective]?”

    If timing is the blocker: “Understood. If we start at $[A], can we schedule a written review in six months with criteria X/Y/Z for moving to $[X]?”

    Current Role — Raise Script

    You (manager 1:1): “I’d like to revisit compensation. Over the last [timeframe] I [three bullets: ‘led ___ launch,’ ‘cut costs by ___,’ ‘mentored ___’]. Based on scope and market, I’m seeking an adjustment to $[X].”

    If budget is tight: “If we can’t reach $[X] now, I’m open to a path: $[A] today with a written plan to $[X] by [date], tied to [measurable goals]. Could we also consider a one-time bonus or additional PTO?”

    If they need time: “Thanks for considering. What would be helpful from me, and when can we reconvene? I’ll send a one-pager with metrics today.”

    Freelance — Rate Increase Email

    Subject: Updating scope & rate for [Project/Retainer] starting [Month]

    Hi [Name],
    Over the past [period], we’ve delivered [one-line result], including [brief outcome]. To maintain quality and faster turnaround, my standard rate for [service] will adjust to $[new rate] starting [date] (from $[old rate]).

    To make this simple, here are two options:
    1) Retainer: [deliverables] at $[price]/month (priority turnaround).
    2) Project: [scope] at $[price] (fixed, includes one revision).

    If you confirm by [date], I’m happy to honor the current rate for one final cycle. Thanks for the partnership—looking forward to next steps.
    Best,
    [You]

    Freelance — Short Call Quote

    You: “For the outcome you described—[result] by [date]—the fixed investment is $[price], which includes [deliverables] and [turnaround]. Shall I send the SOW today?”

    If they want cheaper: “We can land at $[lower] by removing [deliverable] and moving the deadline to [date]. Which option works best?”

    Objection Handling (Copy/Paste Replies)

    • “That’s above our range.” “Totally get it. If base must stay at $[A], which levers have room—sign-on, bonus, title, PTO, or a six-month review tied to [metric]?”
    • “We pay the same for everyone at this level.” “I respect consistency. Given scope and impact, what’s the path to [next level] and timeline to align compensation?”
    • “Can you hold the old rate?” “To keep quality and response times, $[new] is the sustainable rate. I can honor the current rate for one last cycle if we confirm by [date].”

    Numbers You Can Stand On

    • Salary target: Use credible ranges; anchor near the 60–75th percentile for your role/geo.
    • Freelance floor: (Time × target hourly) + tool costs + 20% buffer = minimum viable price. Quote fixed where possible.
    • Anchor cleanly: “Based on scope and outcomes, I’m targeting $[X].” (Pause—let them respond.)

    Delivery Tips & Timeline

    • Tone first, numbers second: Lead with enthusiasm, then ask.
    • Silence is a tool: After the ask, stop talking. Let them process.
    • Recap in writing: “Thanks—recapping my understanding…” and list next steps.
    • Follow-up: Same day send recap; +3 business days nudge; +7 days lock alternates or next steps.

    Bottom line: Know your numbers, ask cleanly, and trade smartly. These scripts give you steady language for high-stakes moments—so your value and compensation align.

  • Time vs Money: Decide What to Outsource

    Time vs Money: Decide What to Outsource

    Your time is a nonrenewable asset. Smart outsourcing helps you buy back time for health, family, and focus—without blowing the budget. This guide gives you a calm, repeatable way to evaluate time vs money tradeoffs, choose what to outsource at home, and avoid subscription creep.

    The Calm Decision Framework

    1. List your drains: Circle 3 recurring tasks you dread (cleaning, laundry, errands, lawn, meal prep, admin).
    2. Time it: Track one normal week. Write the minutes each task actually takes (not what you hope).
    3. Price options: Get 2–3 quotes (flat fees beat hourly). Check cancel terms and trial periods.
    4. Pilot for 2 weeks: Try one service at a time. Keep notes on time saved and stress reduced.

    Quick ROI Math (so you know it’s worth it)

    Use this simple rule of thumb:

    • Effective Hourly Cost = service price ÷ hours saved
    • Green light if Effective Hourly Cost < your “value-of-time” number and stress drops.

    Pick a conservative value-of-time (e.g., $20–$35/hr for many households). If you’re a freelancer, use your realistic after-tax hourly rate.

    Example Comparison (30-Minute Decisions)

    Task Time Saved / wk Cost / wk Effective $/hr Verdict
    Biweekly cleaning service 3.0 h $60 $20/hr Good if your value-of-time ≥ $20
    Grocery delivery (once/wk) 1.5 h $12 fees + $5 tip ~$11/hr Likely yes; shift to pickup to cut fees
    Lawn care (weekly) 1.0 h $25 $25/hr Depends on budget & allergies/season

    What to Outsource at Home (High Impact)

    • Cleaning (zones): Outsource bathrooms/kitchen only to cut price but keep 70% of the benefit.
    • Groceries: Order staples online; pick up curbside to avoid impulse buys and reduce fees.
    • Meal prep: Rotate: one big-batch cook + one “assembly” kit + two easy freezer nights.
    • Laundry: Wash at home, outsource folding—or vice versa. Partial outsourcing saves the most time per dollar.
    • Admin/errands: Prescription pickup, returns, gift wrapping—batch these with a monthly task runner.
    • Childcare swaps: Trade time with another family to create two “focus evenings” per month at zero cost.

    Budget Guardrails (no chaos)

    • Set a cap: Allocate 3–5% of take-home pay to a “Time Fund.” If an outsourcing choice pushes you over the cap, downgrade or pause.
    • Use a sub-account: Pay services from one labeled account to track easily and cancel fast.
    • Seasonal swaps: Spring: lawn care. Fall: house-deep-clean. Winter: grocery delivery. Keep the total steady by rotating.

    Two-Week Pilot Plan

    1. Week 1: Choose 1 service. Get two quotes. Book a single trial. Log time saved and how you felt on those days.
    2. Week 2: Repeat or try a cheaper variant (e.g., curbside pickup vs. full delivery). Decide keep/modify/cancel.

    Write a one-line rule you’ll follow: “If a service doesn’t save >= 60 minutes/wk at ≤ $20/hr equivalent, I cancel.”

    Quality & Risk Checks

    • Scope: Write what’s included (and not). Surprises cause friction and extra fees.
    • Security: For cleaners and sitters, ask about vetting, insurance, and a simple checklist for entry/exit.
    • Reviews: Prefer vendors with at least 20 recent reviews and clear cancellation policies.

    Scripts You Can Use

    • Price clarity: “What’s the out-the-door price including fees and taxes? Any first-time promos?”
    • Scope guard: “I need X, Y, and Z, but not inside cabinets. Is that included at $___?”
    • Trial ask: “Can we do one trial visit first and then set a recurring schedule if it’s a fit?”

    Avoid These Traps

    • Subscription creep: Calendar a 60-day review; cancel what you didn’t miss.
    • “All-or-nothing” thinking: Partial outsourcing (zones, alternate weeks) maximizes value.
    • Double-paying for convenience + impulse: Pair delivery with a strict list to prevent overbuying.

    Bottom line: Outsourcing isn’t about luxury—it’s a disciplined swap: dollars for hours that matter. Use the math, start with one pilot, cap spending, and review quarterly. Done right, you’ll buy back time and protect both your energy and your budget.

  • High-Leverage Skills That Boost Earning Potential

    High-Leverage Skills That Boost Earning Potential

    If you want a bigger paycheck without burning out, focus on high-leverage skills—abilities that create outsized results across roles and industries. The goal isn’t to collect certificates; it’s to learn the few skills that reliably increase your career ROI, help you solve higher-value problems, and make you visibly useful to teams and customers.

    What Makes a Skill “High-Leverage”

    • Revenue relevance: It influences sales, retention, cost savings, or speed-to-market.
    • Portability: Useful across many jobs and tools, not locked to one platform.
    • Compounding: The more you use it, the better—and faster—you get.

    Skills That Punch Above Their Weight (Starter Pack)

    • Clear business writing: Concise proposals, status updates, and one-page briefs that drive decisions. Practice with a weekly “one-pager” summarizing a problem, options, and a recommendation.
    • Executive communication & storytelling: Turn messy data into a narrative with context, trade-offs, and a recommended next step. Record yourself delivering a 3-minute update; tighten it until it lands.
    • Data literacy: Clean, join, and visualize data to answer “What changed?” and “So what?”. Get comfortable with spreadsheets/SQL basics and guardrails for interpreting results.
    • AI copilot & workflow automation: Use AI to draft, summarize, and generate first passes; connect tools (forms → sheets → email) to remove manual work. Measure hours saved, not just features used.
    • No-code building: Spin up simple internal tools (dashboards, request portals, mini-CRMs) with forms, sheets, and automation. Ship small, useful things in days—not months.
    • Customer discovery & lightweight sales: Ask better questions, surface real pains, and map them to solutions. Skills here boost both IC and manager careers.
    • Negotiation & influence: Frame trades (scope, timing, price) and create win–wins. Start with a “best alternative” and a concessions list before any discussion.
    • Project orchestration: Clarify scope, risks, and owners; run short cycles with demos. On-time delivery is a meta-skill that quietly lifts your market value.

    Pick Your Lane with a 3-Part Filter

    1. Market pull: Which problems (speed, quality, cost, growth) are most valuable in your company or field this quarter?
    2. Skill adjacency: Which option is one step from what you already do, so you can earn while learning?
    3. Portfolio evidence: What can you ship in 2–4 weeks to prove the skill at work?

    30/60/90-Day Upskilling Plan (Under $200)

    1. Days 1–30 — Learn by building: Choose one skill and finish a tiny but real project (e.g., automate a weekly report, write a one-page brief that gets a decision, build a simple dashboard). Budget: free docs/videos + a low-cost course. Deliverable: a before/after showing time saved or clarity gained.
    2. Days 31–60 — Apply to a business use case: Ask a teammate, “What’s the most repetitive task we do that slows us down?” Replace it with a checklist, template, or automation. Track baseline vs. improved metrics (hours, errors, cycle time).
    3. Days 61–90 — Scale & share: Package your solution into a repeatable playbook: 1-pager context, step-by-step setup, and a brief Loom/recording. Teach it to one other person or team; collect a testimonial.

    Prove ROI Fast (So the Skill Pays for Itself)

    • Time saved: “This brief cut approvals from 5 days to 2.”
    • Money earned or protected: “This mini-dashboard identified $12k in preventable rework.”
    • Risk reduced: “Our automation removed manual copy-paste and 3 recurring errors.”

    Capture your wins in a Brag Doc: problem → action → measurable outcome → artifact link. Brag Docs fuel reviews, promotions, and salary talks.

    Keeping It Low-Stress & Affordable

    • Time-box: Two 45-minute sessions on Tue/Thu + one 30-minute review on Sat. Consistency beats marathons.
    • Just-in-time learning: Learn only what unblocks the next deliverable. Park the rest.
    • Prototype first: Ship a scrappy V1 to 3 friendly users; fix what they trip over; then polish.
    • Mentor swap: Trade feedback sessions with a peer—your demo for theirs.

    Example Skill Paths (Pick One to Start)

    • AI + writing: Build a content brief generator and a 1-page decision memo template; show it cuts drafting time by 40%.
    • Data literacy: Create a weekly KPI sheet + chart with a “so-what” summary; review trends with your manager in 5 minutes.
    • No-code ops: Form → sheet → auto-emails to triage internal requests; publish a simple SLA.
    • Negotiation: Draft a “trades matrix” (scope, timing, resources) and use it in your next project or vendor conversation.

    Bottom line: You don’t need a dozen courses. Choose one high-leverage skill, build a real artifact in 30 days, measure the impact, and share the playbook. That’s how you turn learning into repeatable career ROI—and higher earning potential—without the stress.

  • Back-to-School Budget Planner

    Back-to-School Budget Planner

    New school year, fresh start—without the money stress. This simple planner helps you map real costs, spread purchases over a few paychecks, and keep your back to school budget focused on what matters for your family. Use the steps, checklist, and sample budget below to build a plan you can actually stick to.

    Step 1: Set Your Top-Line Number

    Decide how much you can spend this season without borrowing. Consider cash on hand, what you can save over the next 4–6 weeks, and any store credits or gift cards. Pick a total you feel calm about—then work backward to fit the essentials first.

    Step 2: Make Five Buckets

    • Supplies: notebooks, folders, binders, pens, art items
    • Clothing & shoes: basics first; specialty items later
    • Tech: headphones, calculators, device protection
    • Fees & activities: sports, clubs, instrument rentals, field trips
    • Health & extras: physicals, glasses, lunch accounts, transport

    Assign a cap to each bucket. If the total runs over, reduce “nice-to-haves,” delay tech upgrades, or plan to buy some items after school starts (teachers often share precise needs in week one).

    Step 3: Shop in Stages (to protect cash flow)

    • Stage 1 — Essentials: core supplies from the official list, uniform basics, required fees.
    • Stage 2 — Fill-ins: replacement clothing, backup supplies, device accessories.
    • Stage 3 — After week one: only the items teachers confirm are truly needed.

    Spread these stages across two to four weekends so you’re not draining one paycheck.

    Step 4: Stretch Every Dollar

    • Inventory your home first: last year’s extras, backpacks, calculators, unused notebooks.
    • Swap or buy secondhand: kids grow fast—thrift basics and buy shoes/new safety gear fresh.
    • Price match & bundles: compare multi-packs for pens, paper, and notebooks.
    • Pick one “splurge” on purpose: let each child choose a favorite item within a small limit.

    Step 5: Create a Kid-Friendly Mini Budget

    Give each child a small “choice” envelope or prepaid amount (e.g., $15–$30) for fun items. This teaches trade-offs and reduces in-store negotiations. Your job is to fund the essentials; their job is to prioritize the extras.

    Back-to-School Budget Checklist

    • ☐ Download the official supply list and highlight non-negotiables
    • ☐ Audit what you already own (supplies, backpack, lunch box, calculator)
    • ☐ Set total budget and five bucket caps; add a 10% buffer
    • ☐ Plan two shopping trips (Essentials / Fill-ins)
    • ☐ Compare prices online; use pickup to avoid impulse buys
    • ☐ Label supplies and store extras in one bin for midyear top-ups
    • ☐ Track actual spend for next year’s plan

    Sample Budget (One Middle-Schooler)

    Category Cap Notes
    Supplies $65 Binders, paper, pens, highlighters
    Clothing & shoes $140 Basics + one pair sneakers
    Tech $45 Headphones + case; defer big tech
    Fees & activities $60 Clubs, field trip deposits
    Health & extras $35 Co-pays, lunch account top-up
    Buffer (10%) $35 Unexpected requests
    Total $375 Adjust to your household

    Two-Week Timeline (Quick Wins)

    • Week 1, Day 1: Set total + buckets; inventory at home; place pickup order for essentials.
    • Week 1, Day 4: Clothing fit-check; buy only gaps (socks, basics, one pair shoes).
    • Week 2, Day 2: Tech accessories and labels; set up a single bin for extras.
    • Week 2, Day 5: After teacher notes arrive, buy only confirmed needs.

    Common Pitfalls (and Easy Fixes)

    • Buying the whole list at once: Stage purchases and wait for teacher specifics.
    • Letting “cute” drive the cart: Use a kid envelope for wants; stick to caps elsewhere.
    • Forgetting fees and health costs: Reserve a small line for sign-up fees and co-pays.
    • No plan for midyear: Store extras in one labeled bin; note prices for quick refills.

    Bottom line: A good back to school budget is simple: set a calm total, fund the essentials first, and buy the rest in stages. Track what you actually spend this year and next year’s plan practically writes itself.

  • Moving Without Money Chaos: A Realistic Budget

    Moving Without Money Chaos: A Realistic Budget

    Moving is already a life upgrade—you don’t need a surprise credit card bill to go with it. With a clear moving budget checklist, labeled accounts, and a simple decision tree (DIY vs. full-service vs. hybrid), you can build a relocation plan that protects cash flow and your sanity. Use the steps below to create an honest, flexible budget that actually works in the real world.

    Step 1: Choose Your Move Type

    • DIY: You pack, you drive. Cheapest on paper, higher time/energy cost.
    • Full-service: Pros pack, load, transport, and unload. Highest price, lowest hassle.
    • Hybrid: Movers handle the heavy stuff; you pack fragile or easy items. Often the best value.

    Decision tip: If you value time, have stairs/heavy furniture, or are moving long-distance, price hybrid first. If the budget’s tight and the distance is short, compare DIY + a few paid hours of help for loading/unloading.

    Step 2: Map the Real Costs (Not Just the Truck)

    • Transportation: Truck rental or mover fees, fuel, tolls, parking permits, driver tip.
    • Packing supplies: Boxes, tape, bubble wrap, furniture blankets, mattress bags.
    • Labor/help: Movers by the hour or Tasker-style helpers (loading/unloading).
    • Housing overlap: Pro-rated rent, double utilities, deposits, application fees.
    • Utilities & services: Setup fees for electricity, gas, water, internet, trash.
    • Travel & lodging: For long-distance: hotels, meals on the road, pet boarding.
    • Cleaning & repairs: Move-out cleaning, paint, patching materials, carpet cleaning.
    • New place setup: Small furniture gaps (curtains, shelves), tool kit, entry rugs.
    • Contingency (10–15%): Because something always pops up.

    Step 3: Build Your Relocation Plan (Cash Flow Friendly)

    1. Open a “Move Fund” (HYSA or labeled sub-account): Keep costs separate from daily spending.
    2. Automate transfers: From now to move date. Weekly is best for consistency.
    3. Stage purchases: Week 1 supplies, Week 2 utilities/deposits, Week 3 labor, Week 4 truck/movers.
    4. Hold a buffer: Keep 10–15% unassigned until the last week.

    Moving Budget Checklist (Copy & Use)

    • ☐ Get 3 quotes: full-service, hybrid (load/unload only), DIY + helpers
    • ☐ Reserve truck/movers + building elevator/parking permits
    • ☐ Order supplies (estimate 10–15 boxes per room)
    • ☐ Schedule utility shutoff & start dates; confirm deposits/fees
    • ☐ Book cleaners or set a DIY cleaning kit
    • ☐ Plan travel days (lodging, meals, pet care)
    • ☐ Photograph old place condition (for deposit return)
    • ☐ Pack “Day 1” box (tools, sheets, toiletries, coffee, chargers)

    Sample Budget (Hybrid Move, 2-Bedroom, In-City)

    Category Amount Notes
    Movers (4 hrs @ $140/hr) $560 Load/unload only
    Truck rental + fuel/tolls $180 One-day, local
    Packing supplies $130 Boxes, tape, bubble wrap
    Permits & parking $60 City curb permit
    Cleaning/patching $120 DIY supplies or cleaner
    Utilities setup fees $160 Electric, gas, internet
    New place setup $140 Rods, hooks, entry mat
    Contingency (12%) $160 Hiccups buffer
    Total $1,510 Fund in “Move Fund”

    Timeline That Prevents Panic

    • 6–8 weeks out: Pick move type; open Move Fund; request quotes; set savings transfers.
    • 4 weeks out: Reserve movers/truck/permits; start decluttering (sell/donate to shrink volume).
    • 2 weeks out: Order supplies; pack low-use rooms; schedule utility start/stop.
    • 1 week out: Confirm elevator windows and parking; pack “Day 1” box; hold contingency cash.
    • Move day: Tip crew if applicable; track spending; photograph both places.
    • 1 week after: Return equipment, submit deposit claim, reconcile actual vs. budget.

    Cost Traps to Avoid (and Easy Fixes)

    • Underestimating boxes: Buy a bundle; return extras. Cheaper than last-minute runs.
    • Weekend-only moves: Midweek can be cheaper for trucks and permits.
    • Elevator/parking surprises: Reserve building elevator and curb space to avoid delay fees.
    • New-stuff impulse buys: List true gaps first (curtains, trash cans). Wait one pay cycle for décor.

    Quick Scripts (for quotes & fees)

    • Movers: “Can you price load/unload only and a 3-hour minimum? What fees change if the building has stairs or no elevator?”
    • Truck rental: “What’s the total out-the-door cost including mileage, insurance, toll pass, and fuel policy?”
    • Utilities: “Are there connection or equipment fees I should expect on my first bill?”
    • Landlord: “Can we schedule a pre-move walkthrough so I know exactly what’s required to receive the full deposit?”

    Bottom line: A calm move comes from clarity: name your costs, stage your spending, and keep a small buffer. With a realistic moving budget checklist and a little automation, you’ll step into your new place without money chaos.